


![SoftPro™ Chlorine+ Carbon Whole House Water Filter to Remove PFAS, Chlorine, Chloramine & Pesticides [City Water Filters Series]](http://www.softprowatersystems.com/cdn/shop/files/SoftPro_Whole_House_Carbon_Filter_with_Spin_Down_Water_Filter.webp?v=1783547361&width=140)
![SoftPro™ Iron Filter - Iron Master AIO [Air Injected Water Filter / Katalox]](http://www.softprowatersystems.com/cdn/shop/files/SoftPro_AIO_Iron_Master_Iron_Filter_Main.webp?v=1783547787&width=140)


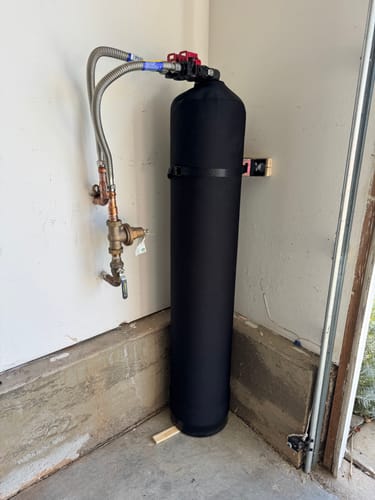
How to Fix Iron Filter Control Valve Leaks Permanently Without Replacing the Entire System

Most iron filter control valve leaks trace back to worn O-rings, mineral buildup, or air pockets — none of which require replacing your entire system. We can fix these problems by cleaning injector assemblies, replacing degraded seals, and clearing greensand debris that's blocking proper valve closure. Catching issues early through post-regeneration inspections saves you from costly repairs down the road. Stick with us and we'll walk you through every fix, step by step.
Key Takeaways
- Inspect and replace worn O-rings and seals, matching manufacturer specifications, to permanently stop leaks without replacing the entire system.
- Clean injector assemblies with CLR every 2-3 years to prevent mineral buildup that causes improper valve sealing.
- Address air pockets immediately to stop media migration into the valve, which causes persistent leaking issues.
- Clear salt bridges from the brine tank and remove greensand debris blocking proper valve closure and sealing.
- Shut off water, relieve pressure, and clean the valve area thoroughly before installing any replacement seals or O-rings.
What's Actually Causing Your Iron Filter Control Valve to Leak

A leaking iron filter control valve almost always comes down to a handful of culprits — and once you know what to look for, diagnosing the problem gets a lot easier.
Worn O-rings and seals are the most common offenders, typically breaking down after years of continuous operation and air-induced friction.
Greensand and mineral debris can infiltrate the valve, preventing it from sealing properly.
A cracked distributor tube is sneakier — it lets media mix into the water supply, mimicking a valve failure when it's actually a structural issue.
Air pockets compound everything by lifting media into the valve and drain line.
We'll walk you through inspecting each component systematically so you're solving the real problem, not just the visible symptom.
Diagnose the Leak Before You Touch Anything
Now that we realize what's likely causing the leak, let's figure out exactly where the problem lives before we start pulling things apart. Rushing in blind is how minor leaks become expensive mistakes.
First, visually inspect the control valve for pooling water or mineral deposits around connections—telltale signs of worn seals or O-rings.
Next, check your water quality. Rust-colored water or inconsistent hardness suggests water's bypassing your iron filter entirely, pointing toward a compromised valve.
Then examine your injector assembly and brine tank for blockages that create air-induced seal wear.
Finally, review your operational parameters—backwash flow rates and regeneration cycle settings. Incorrect configurations accelerate leaks considerably.
Run water tests to correlate iron concentration spikes with valve performance.
Diagnosis first, tools second.
Clear Mineral Buildup From the Control Valve First
Mineral buildup is the silent culprit behind most control valve leaks, so let's tackle it before we do anything else.
Minerals attack O-rings, seals, and injector assemblies, destroying watertight integrity over time. Here's our systematic approach:
- Clean injector assemblies with CLR every 2-3 years—blocked injectors create pressure imbalances that force water past compromised seals.
- Inspect O-rings and seals closely for mineral encrustation; even minor buildup breaks the seal's surface contact.
- Verify backwash cycle flow rates—insufficient flow means minerals aren't evacuating properly, accelerating buildup inside the valve.
Also, address air pockets immediately and clear salt bridges from your brine tank.
Both conditions accelerate mineral migration directly into the control valve, compounding the damage we're trying to reverse.
Replace Worn Seals and O-Rings in the Control Valve
Worn seals and O-rings are the next thing we'll tackle, especially if your system is pushing past the 10-year mark. These small components quietly fail over time, and when they do, leaks follow fast.
Before touching anything, shut off the water supply and relieve system pressure completely. Skipping this step turns a simple repair into a wet mess.
Once that's done, clean the valve and surrounding area thoroughly — debris trapped under a new seal defeats the entire purpose.
A clean surface isn't optional — dirt under a fresh seal guarantees the same failure twice.
When installing replacements, match the manufacturer's exact specifications. Generic substitutes compromise the valve's integrity and invite the same problem back sooner. Do it right once.
Going forward, schedule maintenance checks every two to three years. Catching O-ring wear early keeps leaks from ever becoming a crisis.
Inspect These Four Components After Every Regeneration Cycle
Replacing seals and O-rings buys us time, but staying ahead of leaks means building a quick inspection habit after every regeneration cycle. Four components deserve our attention every time:
- Control valve – Check for fresh leaks or moisture that signals early wear before it worsens.
- Bypass valve seals and O-rings – Look for deterioration; catching this early means a simple seal swap, not a full replacement.
- Injector assembly – Clear any blockages or debris compromising water flow, which directly prevents future leaks.
We should also confirm the brine tank is free of salt bridges, since improper brine flow creates regeneration problems that cascade into leaks.
Consistent post-regeneration checks transform reactive repairs into proactive protection.
Frequently Asked Questions
How Do I Stop My Filter From Leaking?
We'll fix your filter leak by inspecting and replacing worn seals and O-rings, cleaning the injector assembly with CLR, and checking for mineral buildup in the control valve — permanently sealing the system without costly replacements.
Why Does My Iron Filter Keep Draining?
Your iron filter keeps draining because of a faulty control valve that won't seal properly, pressure fluctuations, blocked injectors, or a failed regeneration cycle—often triggered by salt bridges disrupting the brine tank's performance.
Why Is My Multiport Valve Leaking?
Your multiport valve's leaking because worn O-rings, mineral buildup, pressure fluctuations, or misaligned valve seats have compromised its seals. We've seen improper installation accelerate this damage considerably, but targeted repairs can restore a watertight connection permanently.
Why Is My Morton Water Softener Leaking From the Bottom?
Your Morton water softener's leaking from the bottom because worn O-rings, failing seals, or mineral buildup around connections have compromised its integrity. We'd check the bypass valve first—it's usually the culprit.


