


![SoftPro™ Chlorine+ Carbon Whole House Water Filter to Remove PFAS, Chlorine, Chloramine & Pesticides [City Water Filters Series]](http://www.softprowatersystems.com/cdn/shop/files/SoftPro_Whole_House_Carbon_Filter_with_Spin_Down_Water_Filter.webp?v=1783547361&width=140)
![SoftPro™ Iron Filter - Iron Master AIO [Air Injected Water Filter / Katalox]](http://www.softprowatersystems.com/cdn/shop/files/SoftPro_AIO_Iron_Master_Iron_Filter_Main.webp?v=1783547787&width=140)


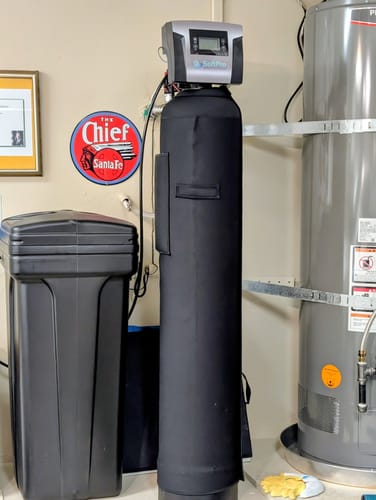
Iron Filter Bypass Valve Installation for Well Water Entry Point Systems: The Full Setup Guide

Installing an iron filter bypass valve at your well water entry point starts with positioning the valve right after the main water entry so every drop flows through your filtration system. We'll need a pipe cutter, Teflon tape, and silicone lubricant before cutting anything. Shut off the main supply first, align the directional arrows, and test for leaks in bypass mode before going live. Stick with us and we'll walk you through every critical detail.
Key Takeaways
- Install the bypass valve immediately after the main water entry point, ensuring at least 2 feet of clearance for easy servicing and code compliance.
- Shut off the main water supply before installation, applying silicone lubricant to O-rings and aligning directional arrows with water flow.
- Use a pipe cutter for copper lines or a saw for PVC, marking cut points clearly and placing a bucket underneath.
- Connect a 1/2 inch drain line with a hose clamp, maintaining under 20 feet in length and a 3-inch air gap above the drain.
- Test by switching to bypass mode, inspecting joints for leaks, and confirming a flow rate of 5-10 gallons per minute.
Where to Position Your Bypass Valve on a Well Water Entry Point

When installing a bypass valve on a well water entry point, we'll want to position it immediately after the main water entry point — this gives us easy access for maintenance while ensuring every drop of incoming water passes through the filtration system.
Think of this placement as setting up a command center: everything flows through it, and we're always in control.
We'll also need to maintain at least 2 feet of clearance around the valve. That breathing room isn't just about airflow — it's what makes servicing practical rather than frustrating.
Before finalizing placement, check local plumbing codes. Regulations around bypass valve configuration vary by region, and confirming compliance upfront saves us from costly corrections later.
Position smart now, operate confidently forever.
What Tools and Fittings You Need Before Cutting the Water Line
Once we've locked in the perfect valve position, it's time to gather everything we'll need before we make that first cut — because nothing slows down an installation faster than hunting for a missing fitting mid-job.
For copper lines, grab a pipe cutter; for PVC, a saw guarantees clean, square cuts. You'll also want channel locks, pliers, and Teflon tape to lock connections down tight and seal out leaks.
Mark your cutting points clearly with a marker — precision here saves headaches later. Keep flexible connectors nearby to bridge any alignment gaps between your water line and filter system.
Finally, position a bucket under the cut zone before you start. That line holds pressure, and water will flow the moment you break it.
How to Install the Iron Filter Bypass Valve
Before we make a single connection, shutting off the main water supply is the first move — it keeps us safe and gives us a dry workspace to get this right.
Next, grab the silicone lubricant and coat every O-ring on the bypass valve couplings. This small step creates a tight seal and prevents future leaks that'll cost us time later.
When attaching the valve, hand-tighten the screws until snug — over-tightening crushes O-rings and damages fittings we'd rather not replace.
Before locking everything down, confirm the directional arrows align with the water flow. Reversed installation kills proper circulation.
Once connected, restore pressure while staying in bypass mode. We're testing for leaks first before trusting the system with regular operation.
Smart sequence, clean result.
How to Connect the Drain Line and Prevent Backflow Contamination
With the bypass valve locked in, the drain line is our next critical connection — and getting it right is what keeps contaminated backwash water from ever finding its way back into our system.
We'll use 1/2 inch tubing, secured to the drain barb with a hose clamp — no shortcuts here. Keep the run under 20 feet to maintain solid discharge pressure, and always terminate it with a 3-inch air gap above the drain. That gap is our physical barrier against sewage backflow contamination.
We're also installing a dedicated backwash drainage line specifically for filter regeneration cycles. This protects our home's plumbing from expelled contaminants.
Finally, we inspect all connections regularly, keeping everything leak-free and code-compliant — because long-term system integrity depends on consistent maintenance discipline.
How to Test Your Iron Filter Bypass Valve After Installation
Now that the drain line is secured, let's put our bypass valve to the test — because a proper post-installation check is what separates a reliable system from a future headache.
First, turn on the main supply and switch to bypass mode, isolating the filter entirely. Grab a flashlight and inspect every joint and fitting for moisture — catch leaks now, not later.
Next, confirm your flow rate hits 5-10 gallons per minute, depending on your filter's design specs. Collect a water sample from the bypass output and verify iron levels match untreated water expectations — that's your baseline.
Finally, switch back to normal operation and watch for pressure drops or inconsistent flow. Consistency here confirms your bypass valve is functioning exactly as it should.
Frequently Asked Questions
How to Install Iron Filter for Well Water?
We'll start by shutting off your main water supply, then position the iron filter at the entry point, install the bypass valve, connect the backwash drain line, and monitor pressure between 30-125 psi.
Do You Need a Bypass Valve to Install a Water Filtration System?
While it's not mandatory, we'd strongly recommend installing a bypass valve—it's a game-changer. It lets us maintain our filtration system without cutting off household water supply, protecting both convenience and system longevity.
Does the Pressure Tank Go Before or After the Filter?
The pressure tank goes after the filter. We always want filtered water flowing into the tank—this keeps sediment out, protects system performance, and guarantees clean, treated water reaches every faucet in your home.
What Position Should My Water Softener Bypass Valve Be In?
We recommend keeping your bypass valve in the "service" position during normal operation — that's how your softener actively treats your water. Switch it to "bypass" only when you're performing maintenance or troubleshooting.


