


![SoftPro™ Chlorine+ Carbon Whole House Water Filter to Remove PFAS, Chlorine, Chloramine & Pesticides [City Water Filters Series]](http://www.softprowatersystems.com/cdn/shop/files/SoftPro_Whole_House_Carbon_Filter_with_Spin_Down_Water_Filter.webp?v=1783547361&width=140)
![SoftPro™ Iron Filter - Iron Master AIO [Air Injected Water Filter / Katalox]](http://www.softprowatersystems.com/cdn/shop/files/SoftPro_AIO_Iron_Master_Iron_Filter_Main.webp?v=1783547787&width=140)


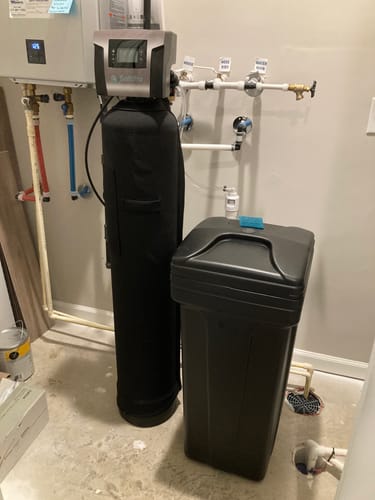
Iron Filter First Flush Startup Procedure: The Complete Step-by-Step Guide After Installation

After installing your iron filter, the first flush is your system's most critical moment. It clears trapped contaminants, eliminates stubborn air pockets, and confirms everything's working correctly. We recommend restoring water pressure slowly, running a 15-20 minute backwash cycle, and testing your iron levels afterward — targeting below 0.3 mg/L. Skipping these steps often leads to weeks of frustrating troubleshooting. Stick with us, and we'll walk you through every step to get it right the first time.
Key Takeaways
- Slowly open the main water supply valve to build pressure gradually, then monitor all fittings and connections as pressure stabilizes over 2-3 minutes.
- Run an initial backwash cycle for 15-20 minutes to flush installation debris, watching the drain line until water runs completely clear.
- The first flush clears contaminants from the media, eliminates air pockets, and builds the necessary operating pressure for the system.
- Test iron levels before and after installation, targeting below 0.3 mg/L for both ferrous and ferric iron to confirm filter effectiveness.
- If reduced flow, discoloration, or leaks occur during startup, inspect filters for clogs, check pH levels, and tighten all connections immediately.
Why Your Iron Filter Needs a First Flush Before Regular Use

When we install a new iron filter, the last thing we want is for debris, dust, or loose media to sneak into our household water supply before the system has had a chance to properly settle.
That's exactly why the first flush isn't optional — it's essential.
Think of it as the filter's initiation run. It clears out contaminants trapped in the media, eliminates stubborn air pockets, and builds the pressure needed for efficient, consistent operation.
The first flush clears trapped contaminants, purges air pockets, and builds the pressure your iron filter needs to perform.
It also reveals problems early — improper media layering, loose connections — before they compromise performance.
Once we've completed the flush, testing for iron content confirms the system's ready for daily use.
Skip this step, and we're gambling with water quality from day one.
Restore Water Pressure Slowly After Iron Filter Installation
Once the iron filter is installed, we'll want to reopen the main water supply valve slowly — gradual pressure buildup protects the system's components from sudden stress and keeps connections intact.
Here's what we're watching for during this critical phase:
- Monitor every fitting and connection as pressure rises — one overlooked joint can flood the installation area instantly.
- Give the tank 2-3 minutes to stabilize while water fills it completely before moving forward.
- Inspect for leaks immediately — early detection prevents costly water damage and component failure.
- Run a 15-20 minute backwash cycle once pressure holds steady, clearing debris and conditioning the filter media for effective iron removal.
After backwashing, test the iron content — clear water confirms the system's working exactly as intended.
Run the Initial Backwash Cycle: What to Watch and When to Stop
With pressure holding steady and the tank fully charged, it's time to let the system do its first real work — the initial backwash cycle.
Run it for 15–20 minutes, giving the media time to settle properly and flush out any installation debris.
Watch the drain line closely. Cloudy or discolored water early on is normal — but when it runs clear, that's your signal the media is clean and ready.
While it's running, walk every connection and fitting. Leaks announce themselves under real operating conditions, not during dry checks.
Once backwash completes, test your water's iron levels. You're targeting below 0.3 mg/L.
Hit that threshold, and you've confirmed the system is dialed in and performing exactly as designed.
Test Your Iron Levels to Confirm the Filter Is Working
Now that the backwash cycle has run, it's time to pull out your test kit and confirm the filter is actually doing its job. Testing isn't optional—it's how you know you've won.
Here's what to verify:
- Test before and after installation — Compare both readings to measure your filter's real impact.
- Target below 0.3 mg/L — Anything above signals your system needs attention, not celebration.
- Test for both ferrous and ferric iron — Each type behaves differently, and missing one means missing the full picture.
- Schedule retests every few months — Heavy use and maintenance shifts performance, and consistent monitoring keeps you ahead of problems.
Your water should now tell the story your filter is writing.
Iron Filter Startup Problems and How to Fix Them Fast
Even the best installations can hit a snag, so let's walk through the most common startup problems and get your system running right.
If you're noticing reduced flow rates, inspect your sediment or poly-fill filters first—they're likely clogged and need cleaning or replacement.
Reduced flow rates? Your sediment or poly-fill filters are likely clogged and due for cleaning or replacement.
Persistent water discoloration usually signals inadequate iron oxidation, so verify your pH levels and check your aeration system.
Premature media exhaustion? Increase your backwashing frequency immediately.
Skipping routine maintenance is the fastest way to kill your filter's effectiveness.
For leaks during the first flush, tighten all connections and inspect fittings for damage or poorly applied Teflon tape on threaded joints.
Still getting odors or discoloration after initial setup?
Installing additional charcoal filters tackles stubborn organic contaminants that standard filtration misses.
Frequently Asked Questions
How to Backflush an Iron Filter?
We'll start by shutting off your main water supply, then open the backwash valve, letting water flow backward through the media for 15-20 minutes until discharge runs clear, then restore normal flow.
What Is the Correct Order for Water Treatment?
We'll start with sediment pre-filtering, then aerate to oxidize iron, run water through layered filtration (gravel to activated charcoal), test iron levels below 0.3 mg/L, and backwash regularly to maintain peak performance.
How Long to Backwash an Iron Filter?
For the initial backwash, we recommend running it 15-20 minutes to properly prepare the media and flush residual particles. After that, you'll only need backwashing every few weeks to maintain peak flow rates.
Do You Install Iron Filter or Softener First?
We always install the iron filter first, then the softener. This sequence protects your softener's resin from iron fouling, extending its lifespan and ensuring both systems perform at peak efficiency long-term.


