


![SoftPro™ Chlorine+ Carbon Whole House Water Filter to Remove PFAS, Chlorine, Chloramine & Pesticides [City Water Filters Series]](http://www.softprowatersystems.com/cdn/shop/files/SoftPro_Whole_House_Carbon_Filter_with_Spin_Down_Water_Filter.webp?v=1783547361&width=140)
![SoftPro™ Iron Filter - Iron Master AIO [Air Injected Water Filter / Katalox]](http://www.softprowatersystems.com/cdn/shop/files/SoftPro_AIO_Iron_Master_Iron_Filter_Main.webp?v=1783547787&width=140)


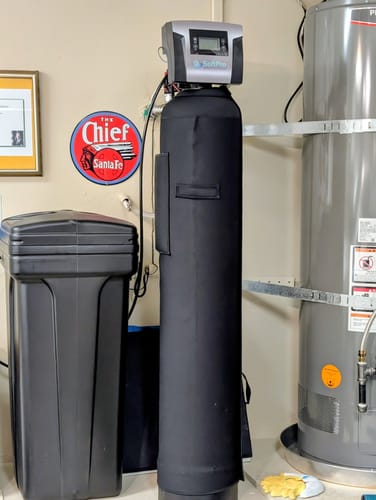
Whole House Iron Filter DIY Installation Guide: From Unboxing All the Way to First Flush

Installing a whole house iron filter yourself is totally doable, and we'll walk you through every step. You'll need the filter system, bypass valve kit, flexible connectors, gravel, filter media, and basic pipe tools. Cut your main line cleanly, load the media correctly, and run a 15–20 minute first flush to purge air and residue. Test your water afterward to confirm it's working. Stick with us, and you'll have everything you need to do this right.
Key Takeaways
- Gather all necessary materials, including the iron filter system, bypass valve kit, flexible connectors, gravel, filter media, drain tubing, and Teflon tape.
- Cut the main water supply line at identified points, install the bypass valve, and secure all connections with Teflon tape and shut-off valves.
- Load the filter tank starting with a 1–2 inch gravel bed, then add iron-removal media evenly while keeping the riser tube centered.
- Gradually reopen the main valve and run the nearest faucet for 15–20 minutes to purge air pockets and red residue.
- Inspect all connection points for leaks during the first flush and test water for iron content to confirm filter effectiveness.
What You Need to Install a Whole House Iron Filter

Before we get started with the installation process, let's make sure we've got everything we need. Having the right materials upfront saves time and prevents frustrating mid-installation trips to the hardware store.
Having the right materials upfront saves time and prevents frustrating mid-installation trips to the hardware store.
You'll need the filter system itself, a bypass valve kit, flexible connectors, gravel, filter media, and drain tubing.
For tools, grab pipe cutters for copper pipes or a saw for PVC, plus Teflon tape for secure threading.
Don't overlook the supporting supplies: mounting hardware, pipe insulation, pressure release buttons, and a pressure gauge to monitor system performance throughout installation.
Before purchasing anything, verify that all components are compatible with your existing plumbing, particularly inlet and outlet port sizes, which can vary by system type — 20x4.5 systems, for instance, typically require 1-inch ports.
Cut Your Main Water Line and Connect the Filter
Now we're getting to the heart of the installation — cutting into the main water line. This step demands precision, so let's break it down clearly.
- Identify your cut points — locate ideal spots on the main supply line that align with your filter's inlet/outlet positions.
- Make clean cuts — use a pipe cutter for copper or a saw for PVC; jagged cuts compromise connections.
- Install a bypass valve — this lets you isolate the filter during maintenance without killing your entire water supply.
- Secure every connection — wrap threaded fittings with Teflon tape, tighten firmly, then install shut-off valves before and after the filter for precise flow control.
Master these steps, and you've built a system that's both reliable and maintainable.
Load Filter Media Into the Tank Correctly
With the filter housing in place, it's time to load the media — and how you do this makes all the difference between a system that performs and one that fails prematurely.
Start with a 1-2 inch gravel bed at the bottom; this isn't optional — it anchors everything above it. Next, add your iron-removal media exactly as the manufacturer specifies, distributing it evenly across the tank to maintain consistent flow rates. Uneven media creates channeling, which destroys filtration efficiency.
Before sealing up, confirm the riser tube sits centered in the tank — any misalignment allows media bypass, and you'll never fully trust your water again.
A misaligned riser tube means media bypass — and once that trust in your water is gone, it's gone.
Secure the tank head, install the bypass valve correctly, and you're ready for the next phase.
Run Your First Flush and Check for Leaks
Once the media is loaded and everything's buttoned up, it's time for the moment of truth — the first flush. Here's how we do it right:
- Gradually reopen the main valve — partial turns only, no sudden surges.
- Run the nearest faucet for 15–20 minutes to purge red residue and air pockets from the system.
- Inspect every connection point — soldered joints, push-fittings, all of it — while water flows under pressure.
- Monitor water clarity as it runs; cloudiness clearing is your first real-time signal the filter's working.
After the flush, test your water for iron content. That number tells us definitively whether the filter's performing or needs adjustment.
Don't skip it — it's our proof of success.
Maintain Your Whole House Iron Filter Year After Year
Getting a clean first flush is satisfying, but the real story of your filter's performance unfolds over months and years. We recommend building these habits into your routine:
| Maintenance Task | Frequency |
|---|---|
| Inspect and clean filter media | Every 6–12 months |
| Monitor pressure gauge for drops | Ongoing |
| Check and refill brine tank salt | As needed |
| Test water for iron levels | Regularly |
| Log maintenance and test results | Every service visit |
Pressure drops tell you something's wrong before your water quality does — catch it early. Salt levels directly impact iron removal efficiency, so don't let the brine tank run dry. Most importantly, that maintenance log transforms guesswork into mastery, revealing patterns that keep your system performing at its peak indefinitely.
Frequently Asked Questions
How to Install a Whole House Iron Filter?
We'll start by shutting off your main water supply, draining the lines, then assembling the media tank, cutting the main line, connecting fittings, installing shut-off valves, securing the filter housing, and finally flushing the system thoroughly.
How Often Should an Iron Filter Backwash?
We recommend backwashing your iron filter every 3 to 7 days, but watch your pressure gauge closely—a significant drop signals it's time sooner. Adjust frequency if you're experiencing frequent clogging.
How to Flush a New Whole House Water Filter?
To flush your new whole house water filter, we'll partially open the mainline valve, run the nearest faucet for 5 minutes, then fully open the valve, continuing until water runs completely clear.
What Is the Correct Order for Water Treatment?
We recommend starting with sediment filtration, then iron filtration, followed by activated carbon, water softening, optional reverse osmosis, and finally UV treatment to eliminate remaining bacteria—ensuring you've got the cleanest, safest water possible throughout your home.


